Customers & KYC Approval
Create a customer, attach KYC documents and take it through verification to Approved.
Used bySales MgrCSRFinance Mgr
Every new customer goes through KYC verification before it can be used. Until it is Approved, the customer is disabled and cannot be selected on quotations, orders or invoices.
Who: Customer Service Rep and Sales Manager create customers; the Finance Manager verifies and approves (the workflow actions are open to any user who can edit customers — follow your internal KYC policy). Menu: CRM → Customers.
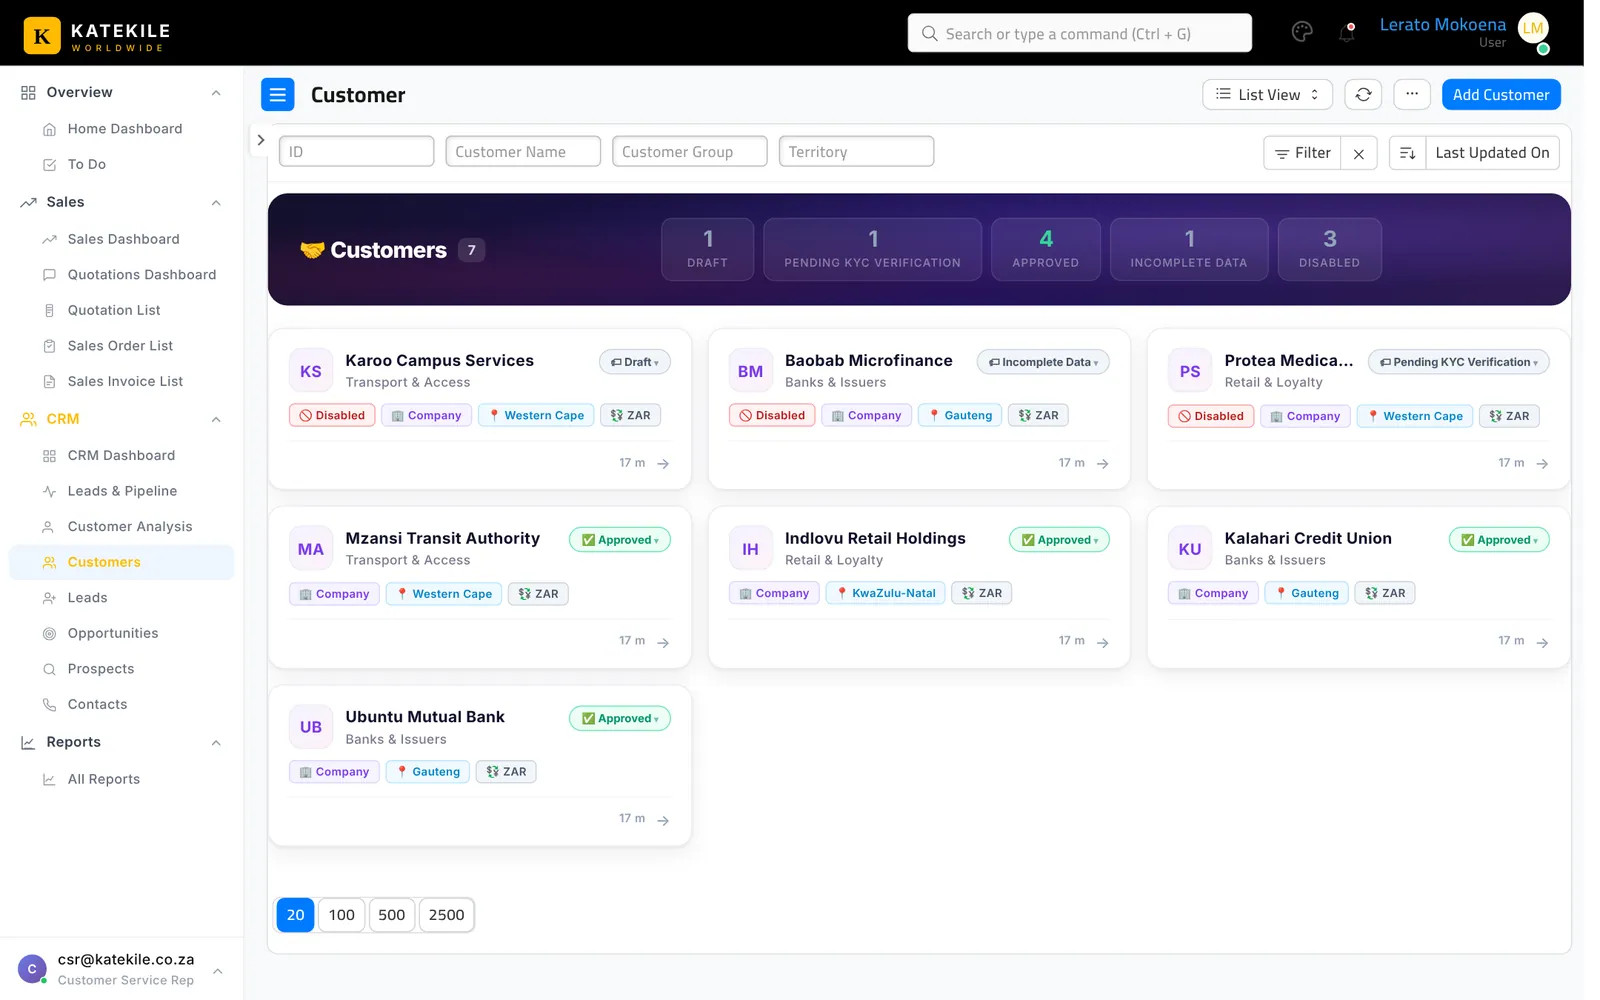
The customer list
Step 1 — Create the customer (Draft)
- CRM → Customers → Add Customer.
- Enter Customer Name, Customer Type (Company / Individual), Customer Group (e.g. Banks & Issuers, Retail & Loyalty, Transport & Access) and Territory.
- Save. The customer is created in state Draft and is disabled.
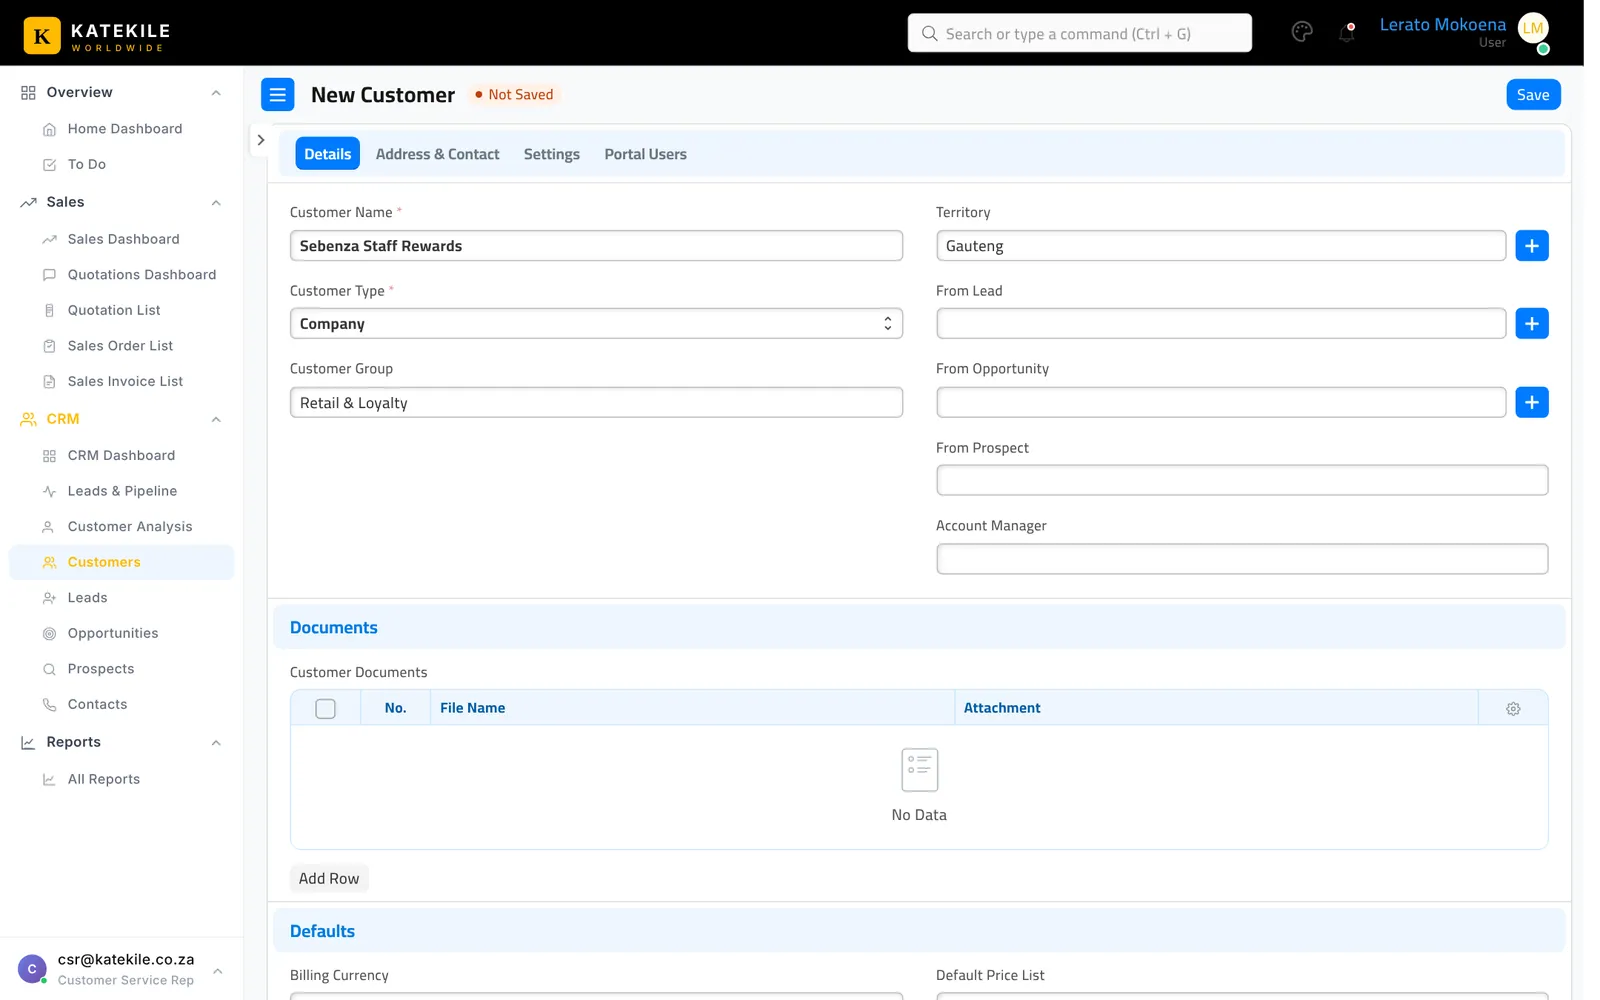
Customers are named after the customer name. If the name already exists, the system adds a suffix (e.g. “Sebenza Staff Rewards – 1”) and tells you — check you are not creating a duplicate.
Step 2 — Attach KYC documents
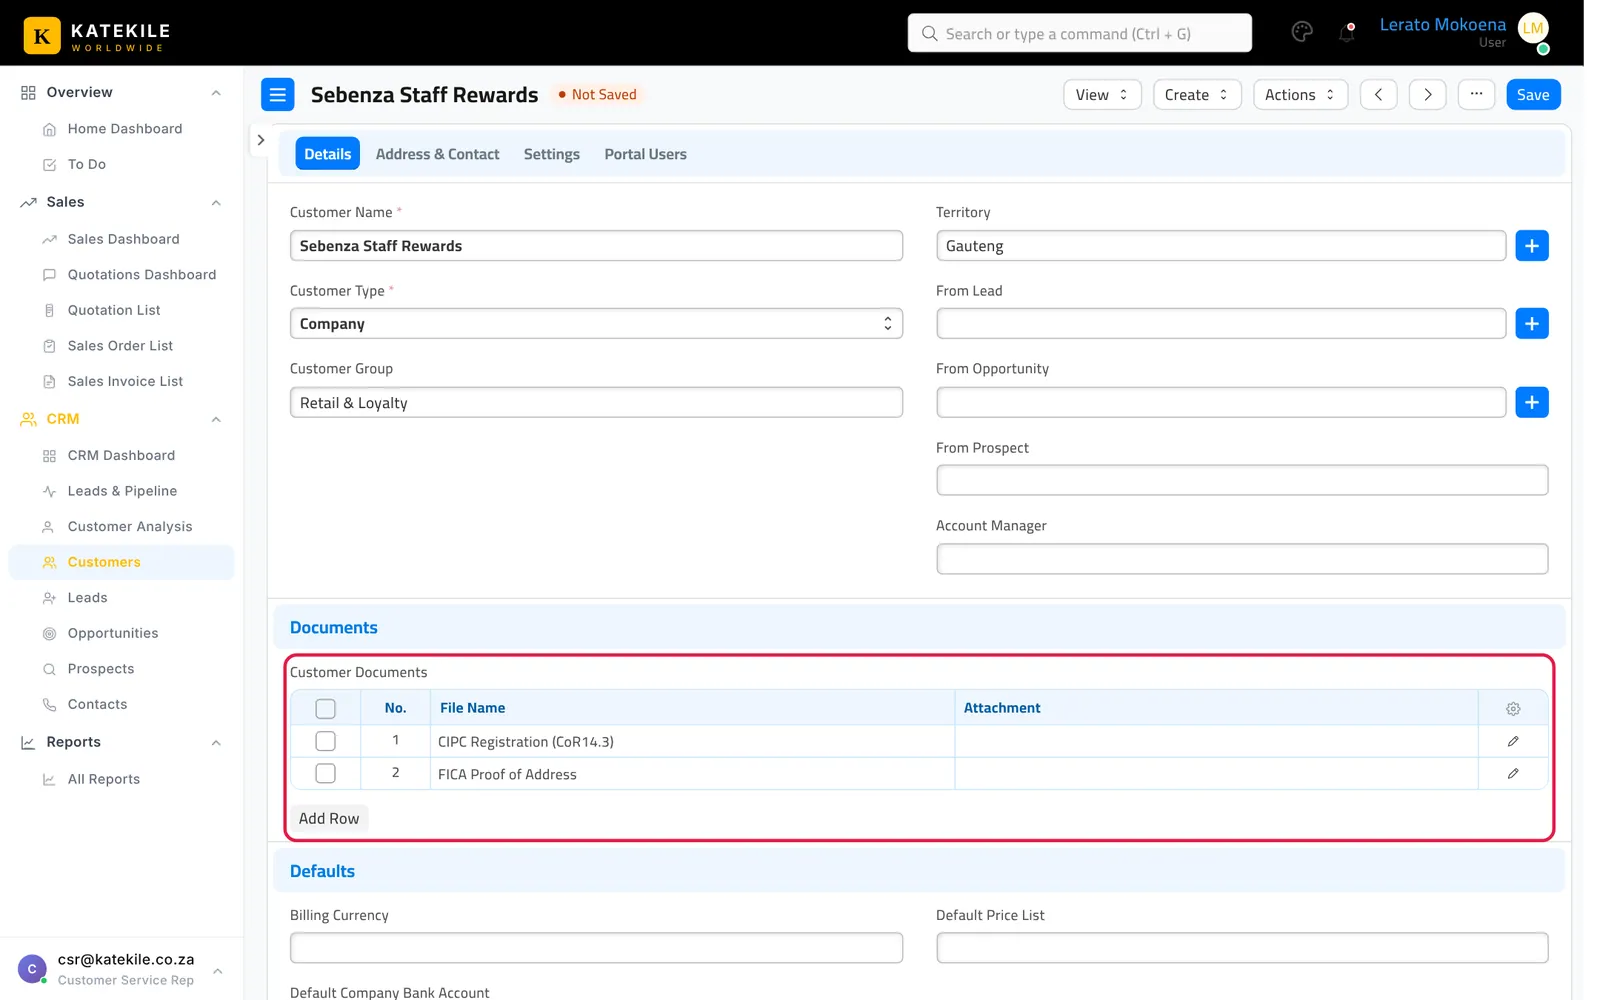
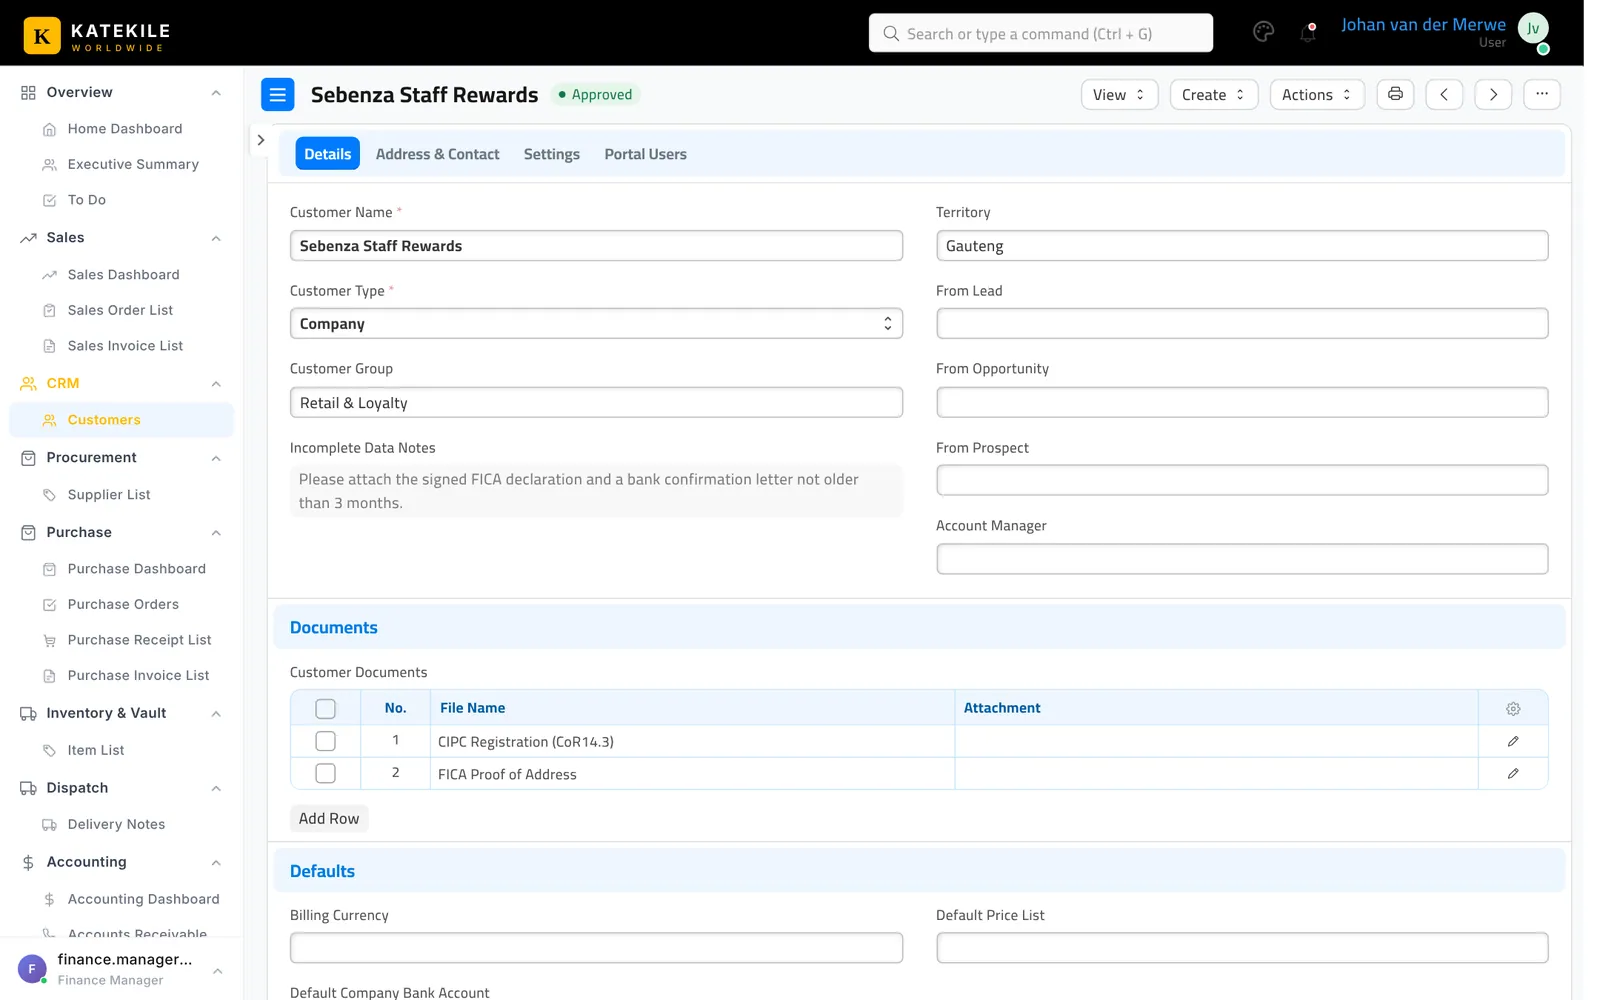
In the Documents section, add a row per document in Customer Documents: a File Name (for example CIPC Registration (CoR14.3), FICA Proof of Address, Bank confirmation letter) and the Attachment. Save.
Step 3 — Send for verification
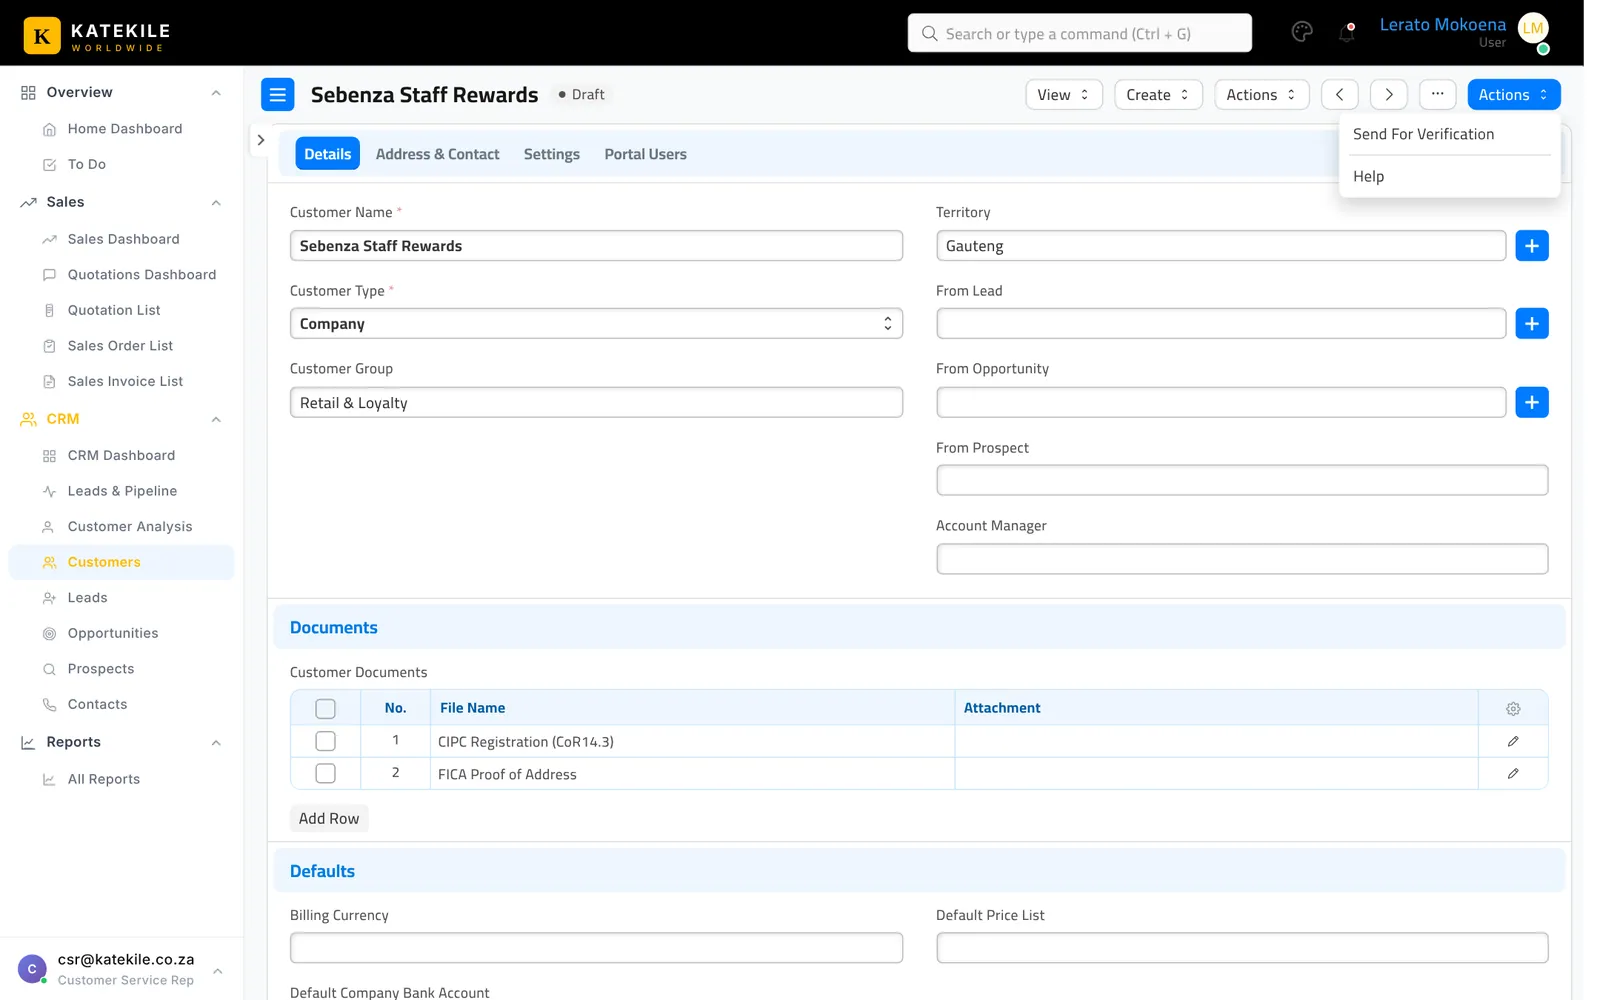
Click Actions → Send For Verification. The state becomes Pending KYC Verification.
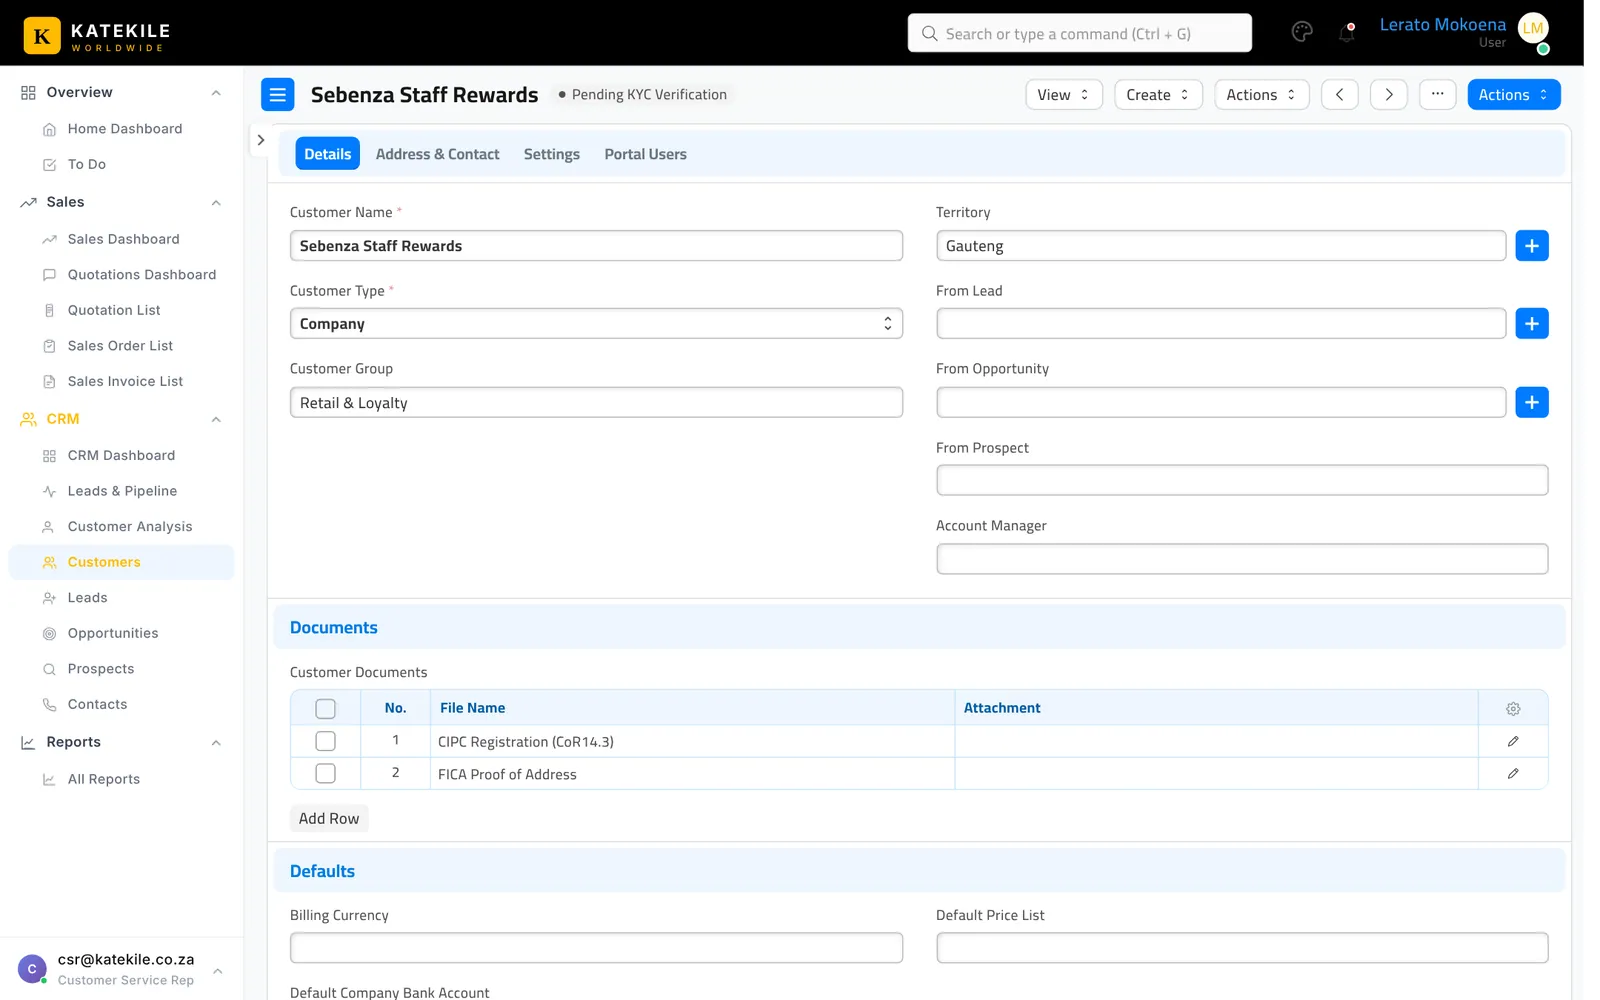
Step 4 — Verify (Finance Manager)
Open the customer and review the details and documents, then choose from Actions:
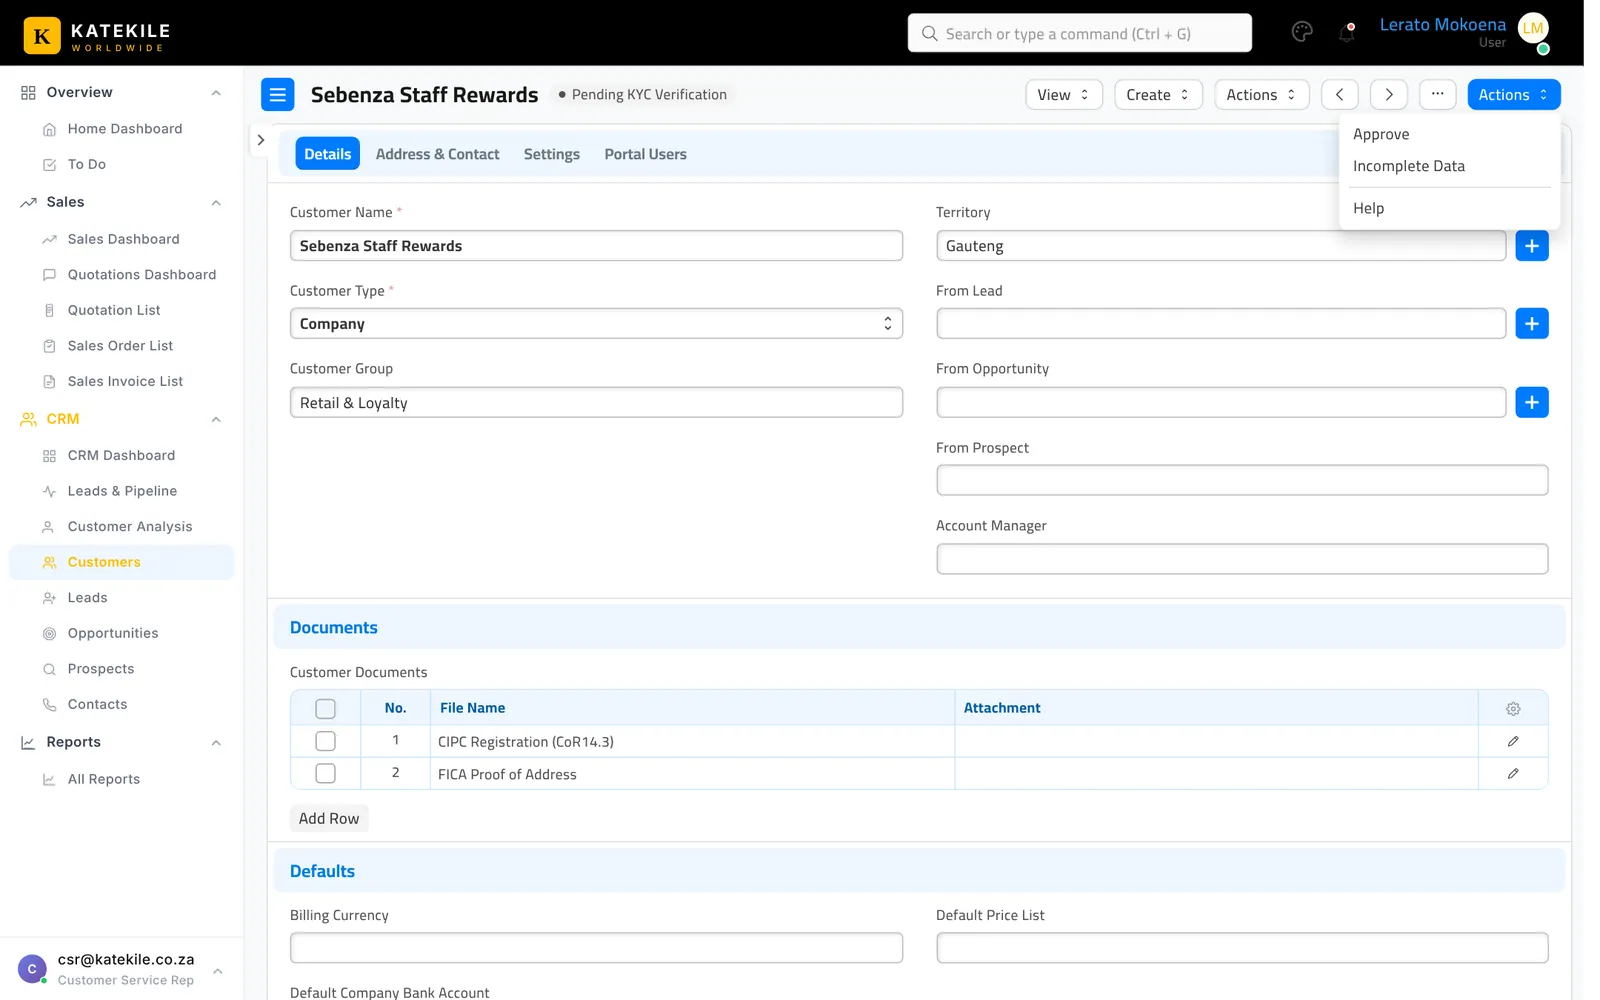
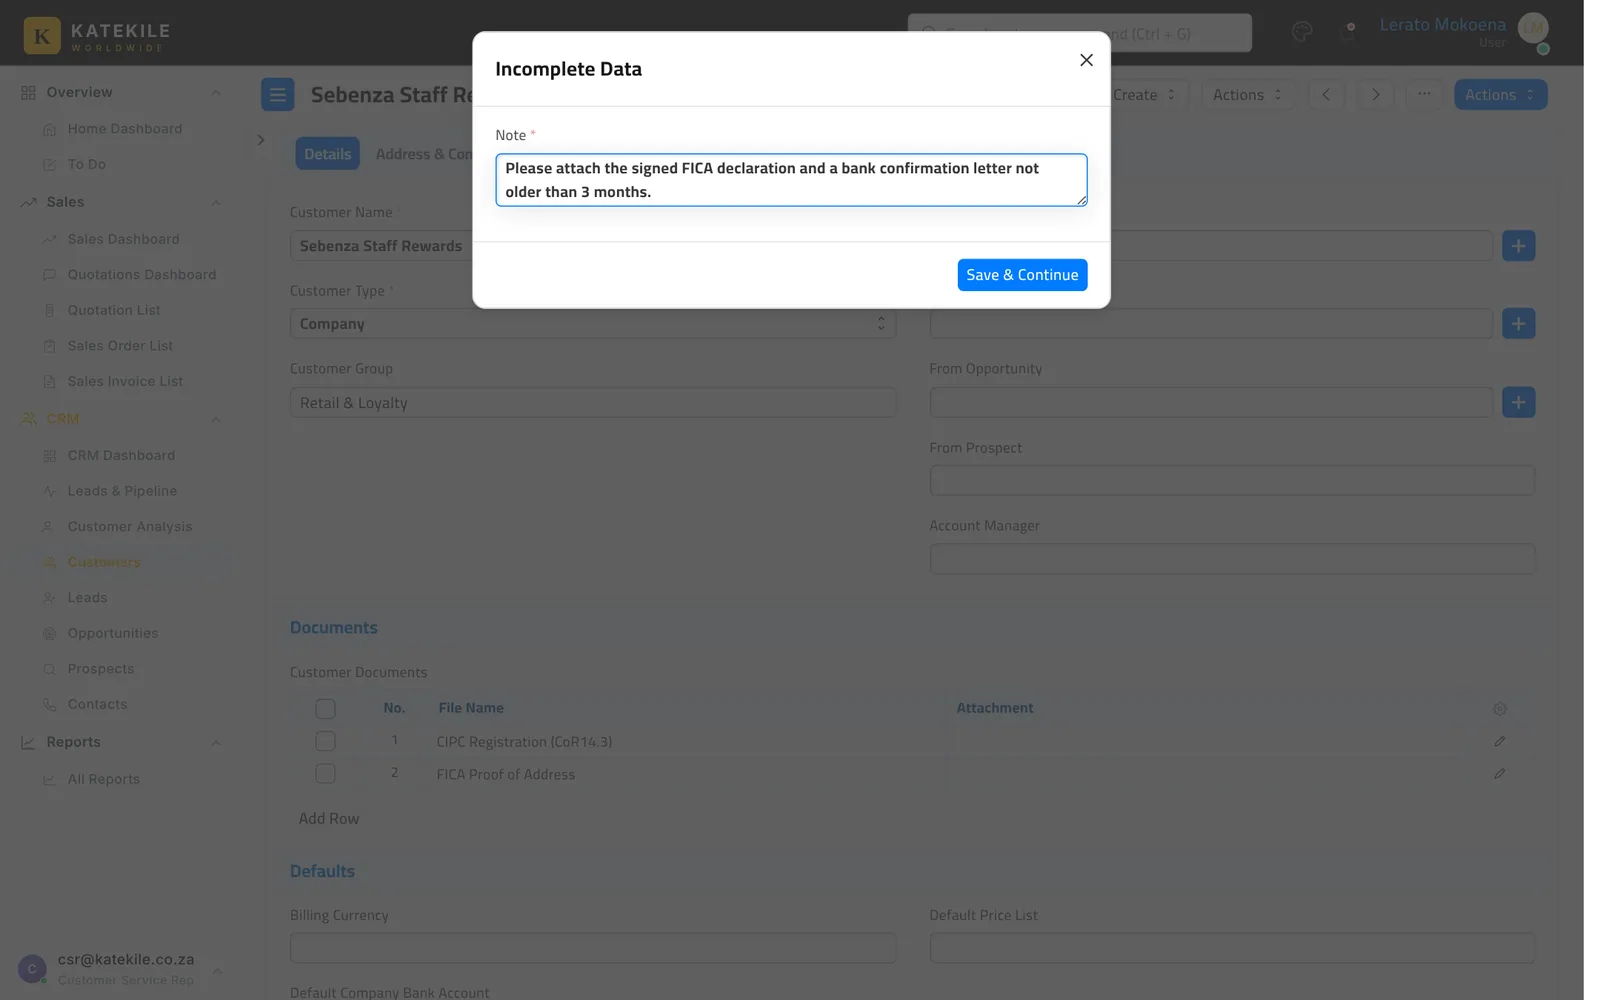
Incomplete Data — a pop-up asks what is missing. Type a clear note and click Save & Continue. The note is saved in Incomplete Data Notes on the customer for the sales team to action.
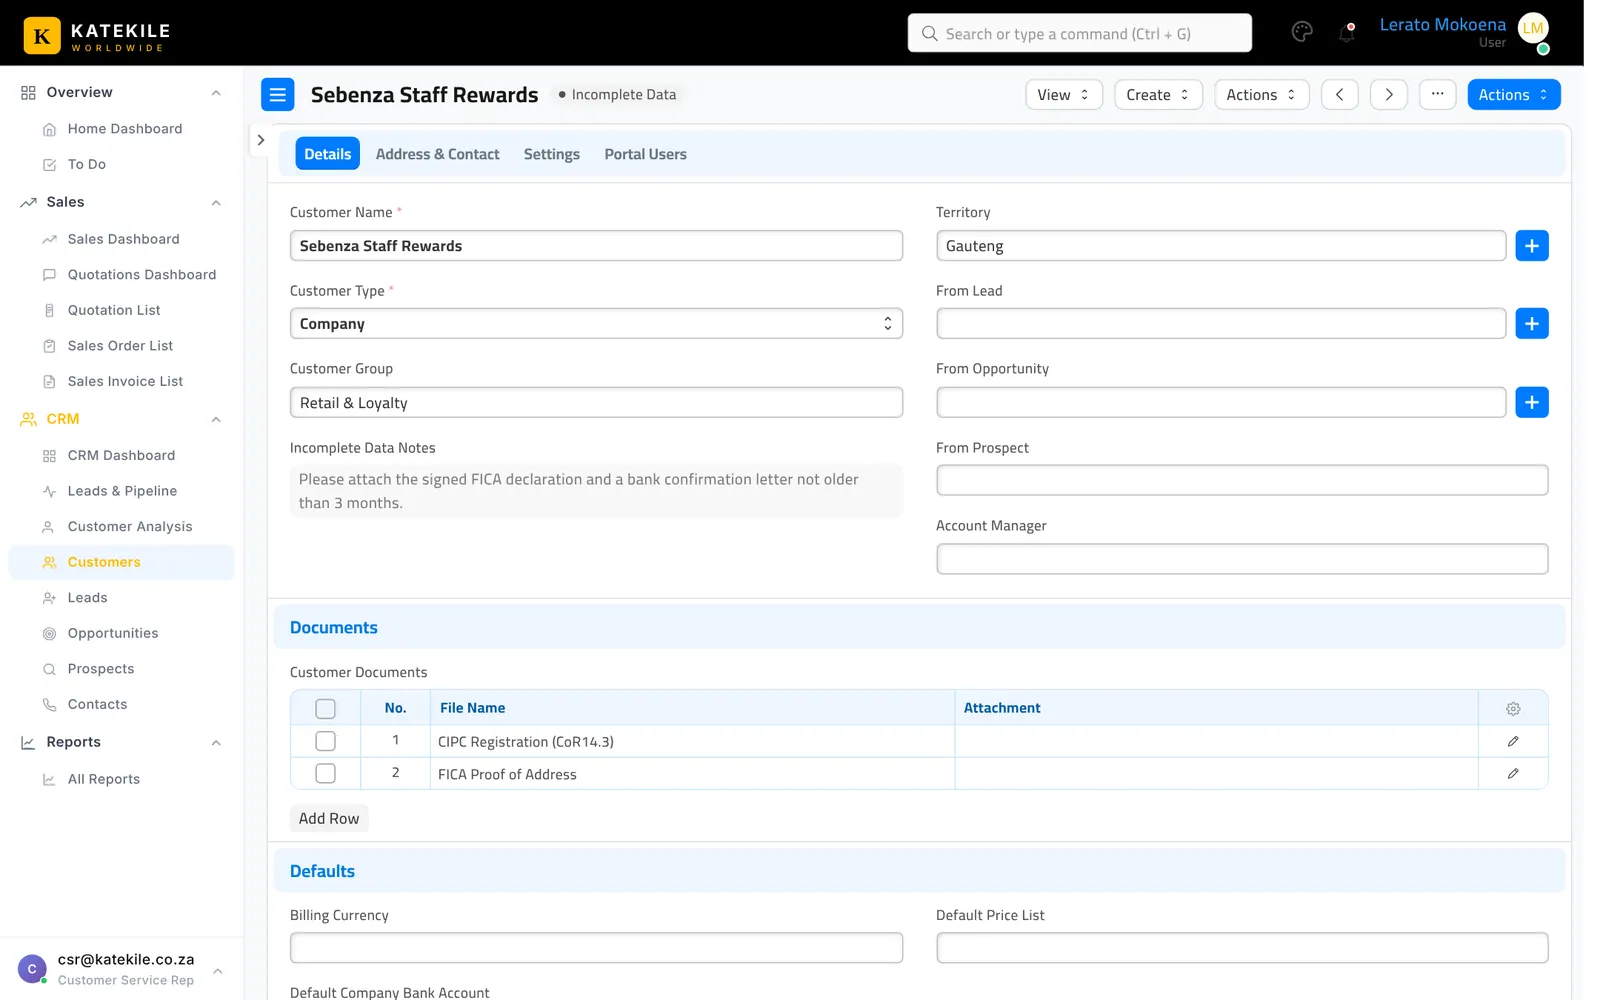
The sales team adds the missing information and clicks Actions → Send For Verification again.
Approve — the customer moves to Approved and is enabled. It can now be used on quotations and orders.
Hidden tabs
To keep the customer form simple, the Tax, Accounting, Sales Team and Dashboard tabs are hidden on Customer.
Last updated October 16, 2026